Tuesday, March 19, 2013

Ikea Revamp Project

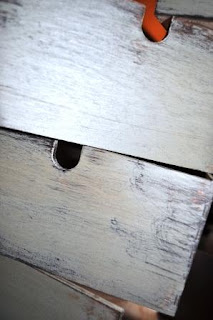
Ikea Revamp Project- My sister-in-law gave me this cute, little, wood, six-drawer cubby that she used to hold her make-up in her bathroom. They were remodeling their bathroom and thought that I might like to use it. I had not tried the staining over paint technique yet so I thought this would be an easy way to test it out.
Step 1: paint the wood piece color of your choice (I chose an olive green)
Step 2: lightly sand wear areas for a distressed look


Step 3: stain the entire piece and wipe off all excess
Step 4: finish the piece with a protective top coat of your choice
             (I used a spray polyurathane)
I finished off my piece with some fun metal numbers
I purchased from my good friends at PINK in Spokane, WA


La Hen House


 La Hen House...my weekend project! This entire coop was constructed with materials around our home, the only thing I had to purchase were the hinges and lock. The roof still needs the shingles attached, but other than that, we are collecting eggs!


 The lovely ladies are; Anna Belle, Ella Mae, Velda Sue and Shaniqua. For those of you who know me or my husband, you will know that the last name is his doings.

The chickens were given to me by a friend of the family and am very thankful for them.

Our first egg is the lovely grayish colored one and the second was a tan. I can not wait to open the box and see a blue or green one!

Below is the completed coop (minus the roof). I would like to build a run off the back of it but have not gotten that far. During the entire process, my little buddy, Olivia, sat outside the fence and watched. I hope the meeting of chicken and dog in a few days goes smooth!


Wednesday, February 27, 2013

Glitter and Glam Antlers

I am not the biggest fan of antlers in our house, but, if I were to put some up they would definitely look like these!
 
GLITTER PAINTED ANTLERS...GET YOU SOME!
 My first yard sale of the season was a few weeks ago to an indoor yard sale at out fairgrounds. The last thing I thought I would pack home was
 a huge box of antlers, but I did!


Add a wood plaque, spray paint, glitter and
BAM- Sweet, glitter painted-                           antlers!

CAKE, Cake, cake!

As you may know from previous posts, I love making cakes! I'm not saying I'm great at it, but I sure love doing it. Here is my latest cake for my three year old niece. Rapunzel in a frying pan! I made the cake a purple buttercream swirl with strawberry filling and strawberry and buttercream frosting...yummmm!

Saturday, February 23, 2013

DIY Apothecary Jars


I have always had a weakness for glass jars. A wall in my craft room is lined with old mason jars filled with trinkets and treasures, my kitchen counter has large ones with snacks and my bathroom vanity is adorned with q-tip and cotton ball filled jars...as I said, I love jars! Here is a fun little diy project with empty candle jars.

 DIY HOW TO:
These particular jars are from Bath and Body Works but any jars or thrift store finds will work. Make sure your jars are nice and cleaned out before you begin.
 
Select nobs for the tops, if you want, and drill holes for the knobs.

Paint the tops your color of choice (I chose to paint mine a textured brown so the words would not show through).
 
Tape off the area you want to etch and use stickers to spell out any words you want. I use Armour Etch, it is a thick paste that is easy to use and I have had the best luck with it. Follow the directions on how long to let the etch set on your item and wash off.
 
Viola, there you have it, super cute, easy and upcycled apothecary jars for anywhere in your house!

Friday, February 22, 2013

Who doesn't love a nest?


I decided to try my hand at a little painting, on canvas, not furniture, that is. I am always drawn to nest paintings and then shy away at the price. The last nest painting I was swooning over did not have a price so I decided to ask the lovely booth owner and the my surprise, I was holding an 8x8 nest painting that was priced at $85! So...as you can imagine, I decided to paint one. Here are a few that I came up with...enjoy!

Monday, January 28, 2013

DIY Frame Project

 
Upcycling...yay! My favorite thing!
Ok, here is a quick diy project to do with all the old frames laying around.
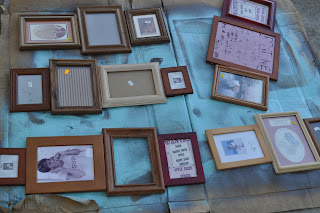
I collected a bunch of wooded frames from thrift stores and laid them out in groupings I thought went well together.
Discarded the glass, painted the frames, inserted some old fabric to stencil, stamp or paint on and then screwed them to a thin piece of wood on the back...and there you have it.
A simple project that can match any decor!

Friday, January 4, 2013

Christmas Open House

Huge thanks to everyone who came to the Christmas Open House.  It was our first year doing this and we were pleasantly surprised with the overwhelming support.  Besides posting the event on the blog, we did a Facebook invite and had over 800 people invited.  The feedback we got was amazing and we are looking forward to doing another event in the spring! 

Thursday, November 29, 2012

Last Sale of the YEAR!!!

Elaine and I will be hosting our last sale of the 2012 year...
I can not believe it went by soo quick!
 

Come shop for unique, handcrafted and vintage items at Betsy BoyerSmith's home. (3971Teal Ln, Lewiston, ID 83501)

There will be items by multiple talented people such as BU2ful Farmhouse Charm, Laural Smith, Konen's Karamels, Oh Sew Green, Gourds by Phyllis, Deanna Grimm and many more!

Shop on Friday, November 30th from 4:00 to 8:00 or Saturday December 1st from 9:00 to 2:00

Hope to see you there and you are more than welcome to bring a friend!

Monday, November 12, 2012

Red Barn Farms 2012

      Finally!!!       Here are some pictures of the booth Elaine and I threw together. We have so much fun going to Red Barn year after year and seeing the same shoppers love our booth puts huge smiles on our faces. This year was a little chilly, but no rain...yay! We can't wait til next year.
 
BIG thanks to Jennifer Konen, Deanna Grimm, Phyllis Hewett, Shirley Boyer and Uncle Don for joining our booth!